How to Turn Clothing Designs Into Production Ready Specs for ZOOKS Enquiry

A strong clothing idea can still fail in manufacturing if the factory cannot understand it clearly. A sketch, moodboard, reference image, or sample garment shows the direction, but it does not tell a manufacturer exactly how to make the product.
To move from idea to sampling and bulk production, a brand needs clear technical information. This is where a production-ready specification, often called a tech pack or spec sheet, becomes essential.
A good specification reduces guesswork. It helps the manufacturer quote more accurately, source the right material, develop the first sample, control sizing, and repeat the garment in bulk with consistency.
A design concept is not the same as a production specification
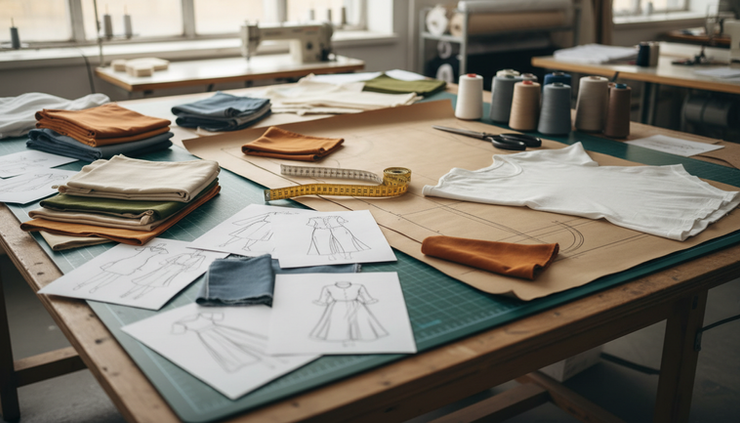
A design concept explains what the garment should look and feel like. It may include:
A rough sketch
A reference photo
A moodboard
A sample purchased from the market
A written idea such as “oversized heavyweight hoodie with embroidery”
Colour inspiration
Fit direction, such as slim, relaxed, cropped, boxy, or regular
This is useful for creative direction, but it is not enough for production.
A production-ready specification explains how the garment should be made. It removes as much interpretation as possible. It should tell the manufacturer:
What the product is
Which fabric to use
How the garment is constructed
What measurements to follow
Which trims and components are needed
Where artwork, labels, and prints go
How the finished product should be packed
For example, “black oversized hoodie” is a design concept.
A production specification would say:
Product type Pullover hoodie
Fabric 100% cotton fleece, 320 GSM, brushed inside
Fit Oversized fit with dropped shoulder
Colour Black, with approved colour reference
Branding Embroidery on left chest, 80 mm wide
Construction Kangaroo pocket, ribbed cuff and hem, double-needle stitching
Packaging Folded in individual polybag with size sticker
This level of detail helps manufacturers such as ZOOKS, a custom and bulk apparel manufacturer, understand the requirement before sampling begins.
Define the product style and construction clearly
The first section of a tech pack or specification sheet should describe the garment style. Keep it simple, but specific.
Start with the product basics
Include the core product information at the top of the document.
Field | Example |
Product name | Men’s oversized hoodie |
Style code | ZK-HDY-001 |
Category | Sweatshirt or hoodie |
Fit | Oversized |
Target wearer | Unisex adult |
Season | Autumn or winter |
Sample size | M |
Order type | Sampling followed by bulk production |
A style code is useful when working on multiple designs. It avoids confusion during sampling, revisions, costing, and production.
Explain the construction details
Construction details tell the manufacturer how the garment should be assembled. Mention visible and functional parts of the product.
For a hoodie, this may include:
Hood style Double-layer hood with drawcord
Pocket Kangaroo pocket with reinforced corners
Sleeve Dropped shoulder with long sleeves
Cuff and hem Ribbed cuff and bottom hem
Neckline Hood attached at neckline with seam tape
Inside finish Brushed fleece inside
For a shirt, mention collar type, placket style, cuff style, yoke, pocket, and hem shape.
For trousers, mention waistband, fly opening, pockets, belt loops, zipper, button, and bottom hem.
Do not assume that the manufacturer will copy a reference image exactly. A reference image can support the explanation, but the written specification should confirm what is required.
Add technical sketches and garment measurements
A production team reads technical sketches differently from fashion illustrations. A fashion sketch may show style and attitude. A technical sketch shows structure, seams, panels, openings, and placement.
Use flat sketches where possible
A flat sketch is a front and back drawing of the garment laid flat. It does not need to be artistic. It needs to be clear.
A good flat sketch should show:
Front view
Back view
Side details if needed
Seam lines
Pocket shape and placement
Collar, cuff, hem, and waistband details
Print or embroidery placement
Label placement
Stitching lines where relevant
Use arrows or callouts to mark details. For instance, point to the left chest and mention “embroidered logo, 80 mm width, centred 90 mm below shoulder seam”.

Provide garment measurements
Measurements are one of the most important parts of the clothing design to production specification process. They guide pattern making, sample development, fit checking, and bulk production.
Common garment measurements include:
Garment | Key measurements |
T-shirt | Chest, body length, shoulder, sleeve length, neck width, bottom opening |
Hoodie | Chest, body length, shoulder, sleeve length, hood height, cuff opening, hem width |
Shirt | Chest, waist, shoulder, sleeve length, collar, cuff, across back |
Trousers | Waist, hip, rise, inseam, outseam, thigh, knee, bottom opening |
Dress | Chest, waist, hip, shoulder, length, sleeve, armhole |
Always confirm whether measurements are taken:
Flat or around the body
Before wash or after wash
In centimetres or inches
From seam to seam or across the full garment
In India and many export workflows, centimetres are commonly used for garment specs, but inches may also be accepted. Pick one unit and use it consistently.
Add measurement tolerances
Tolerances are the allowed variation from the approved measurement. Garments are made by people and machines, so tiny differences can happen in cutting, stitching, washing, and finishing.
Example tolerance format:
Point of measurement | Size M | Tolerance |
Chest width | 58 cm | ±1 cm |
Body length | 70 cm | ±1 cm |
Sleeve length | 62 cm | ±0.75 cm |
Neck width | 20 cm | ±0.5 cm |
Without tolerances, a small difference may become a dispute. With tolerances, both brand and manufacturer know what is acceptable.
Specify fabric, colour, trims, and artwork
Fabric and components affect cost, fit, shrinkage, comfort, appearance, and production time. This section should be detailed enough for sourcing and sampling.
Mention fabric type, GSM, colour, and finish
Do not write only “cotton fabric” or “premium fabric”. These phrases are too broad.
A better fabric specification includes:
Fabric composition 100% cotton, cotton-polyester blend, nylon, viscose, linen, or other composition
Fabric structure Single jersey, pique, fleece, French terry, twill, poplin, rib, interlock, woven denim
GSM Fabric weight such as 180 GSM, 240 GSM, or 320 GSM
Colour Black, off-white, navy, or custom dyed shade with reference
Finish Brushed, bio-washed, enzyme-washed, silicon-washed, peached, garment-dyed, or compacted
For example:
“100% cotton single jersey, 220 GSM, bio-washed, colour off-white as per approved lab dip.”
If the garment needs stretch, specify elastane content. If it needs heavy structure, mention GSM and fabric type clearly.
Give accurate colour references
Colour names can be misleading. One supplier’s “cream” may look like another supplier’s “ivory”.
Use one or more of these references:
Pantone code if available
Fabric swatch
Approved lab dip
Physical sample
Digital artwork file with colour values
Previous approved production sample
For bulk production, approved physical references are often safer than screen colours because screens vary.
List trims and components
Trims are the smaller parts that complete the garment. Missing trim details can delay sampling.
Include details for:
Zippers Type, length, colour, metal or plastic, puller style
Buttons Size, material, colour, number of holes, branding if any
Drawcords Flat or round, colour, length, tip finish
Eyelets Metal or plastic, colour, size
Elastic Width, quality, placement
Rib Composition, GSM, colour, width
Thread Colour, quality, contrast or matching
Interlining Used in collars, cuffs, waistbands, or plackets
Patches and badges Material, size, placement, stitching method
For example, “zipper” is incomplete. “No. 5 nylon zipper, black tape, antique brass puller, 65 cm length” is much clearer.
Define stitching and seams
Stitching affects strength, stretch, appearance, and comfort.
Mention where needed:
Single-needle stitch
Double-needle stitch
Overlock seam
Flatlock seam
Coverstitch
Bar tack at stress points
Chain stitch
Topstitching
Seam tape
For activewear, stretch garments, denim, and heavy outerwear, stitch type becomes even more important.

Prepare artwork files for printing and embroidery
If the garment includes decoration, provide the right artwork and placement details.
For printing, mention:
Print technique Screen print, digital print, sublimation, puff print, discharge print, or heat transfer
Artwork size Width and height in cm
Placement Distance from neckline, shoulder, centre front, side seam, hem, or pocket
Colours Exact colour references
File format Vector file such as AI, EPS, PDF, or high-resolution PNG where suitable
For embroidery, mention:
Embroidery size
Thread colours
Placement
Stitch type if known
Backing preference if required
Whether a sample embroidery swatch is needed first
Avoid sending only a low-resolution screenshot. The manufacturer may not be able to reproduce it cleanly.
Mark labels and branding placement
Labels are part of the product specification. Include:
Main neck label
Size label
Wash care label
Brand tag
Hang tag
Barcode sticker if required
Country of origin label if needed
Woven label, printed label, or heat transfer label
Mention exact placement. For example, “wash care label inserted in left side seam, 10 cm above bottom hem”.
Build a clear tech pack or specification sheet
A tech pack does not need to be complicated at the start. It needs to be complete, organised, and easy to update.
What to include in a beginner-friendly tech pack
A practical tech pack can include these pages or sections:
Style overview
Product name, style code, category, fit, sample size, season, and short description.
Technical sketches
Front and back flat sketches with callouts.
Bill of materials
Fabric, trims, thread, labels, zippers, buttons, packaging, and other components.
Measurement chart
Points of measurement for each size, plus tolerances.
Artwork and branding
Print, embroidery, patches, label files, sizes, and placement.
Construction notes
Stitching, seams, special finishing, pocket details, hemming, lining, and reinforcement.
Colour details
Colour names, references, lab dips, and approved swatches.
Packaging instructions
Folding method, polybag, carton packing, tags, stickers, and size ratios.
Revision notes
Sample comments, dates, changes, and approval status.
Add packaging and finishing requirements
Packaging is often left until the end, but it can affect cost and delivery.
Mention:
Folding method
Individual polybag requirement
Polybag size if known
Size sticker location
Hang tag placement
Tissue paper or cardboard insert if required
Carton packing ratio
Assortment by size and colour
Final pressing or steaming
Thread trimming
Metal detection if relevant
Quality check points
Example packaging note:
“Each t-shirt to be folded with front artwork visible, packed in individual transparent polybag with size sticker on top right corner. Cartons to be packed by colour and size.”
Keep revision control simple
Sampling usually involves changes. Create a revision section so both sides know what changed.
Example:
Sample stage | Comment | Action |
First fit sample | Sleeve length too long by 2 cm | Reduce sleeve length in all sizes |
Print strike-off | Print colour too dull | Match approved colour reference |
Pre-production sample | Approved with minor label position change | Move neck label 1 cm lower |
This avoids repeated mistakes and keeps communication clear.
Use sampling to approve the garment before bulk production
The first sample rarely represents the final bulk product perfectly. Sampling is the stage where the brand and manufacturer test the specification in real material and construction.
Common sample stages
Depending on the product and order, sampling may include:
Proto sample First version to check design, shape, and construction
Fit sample Used to check measurements, comfort, and proportions
Size set sample Samples made in multiple sizes to check grading
Print or embroidery strike-off Test of artwork, colours, stitch density, or print finish
Pre-production sample Final approved sample before bulk manufacturing starts
For simple garments, not every stage may be needed. For complex products, skipping sample approvals can create costly issues later.
What to check before approval
Review the sample against the tech pack, not only by appearance.
Check:
Fabric quality and GSM
Colour accuracy
Fit and measurements
Stitching quality
Seam strength
Print or embroidery placement
Label placement
Trim quality
Finishing and thread trimming
Packaging if included
Take photos, write comments clearly, and mark the sample physically if needed. Avoid comments such as “make it better” or “fit is not right”. Instead, write “increase chest width by 2 cm in size M” or “move embroidery 3 cm towards centre front”.

Avoid common specification mistakes
Many production issues begin before production starts. They come from unclear, missing, or conflicting information.
Common mistakes include:
Sending only reference images with no measurements
Giving body measurements instead of garment measurements without explaining
Using vague fabric descriptions such as “good quality cotton”
Not mentioning GSM
Missing tolerance values
Providing artwork as screenshots
Not specifying print or embroidery size
Giving colour names without references
Forgetting label placement
Leaving zipper, button, or trim details open
Changing the specification after bulk fabric is sourced
Approving a sample verbally without written comments
Not confirming packaging requirements
Using different measurement methods across sizes
The easiest way to prevent these problems is to prepare one master specification document and update it after every approved change.
Final checklist before sending requirements to ZOOKS
Before sending an enquiry to ZOOKS or any custom apparel manufacturer, review this checklist.
Product name and category are clear
Style code is mentioned
Front and back technical sketches are included
Reference image or sample photo is attached if useful
Fabric composition, structure, GSM, colour, and finish are mentioned
Size chart is included
Measurement tolerances are included
Stitching and seam details are clear
Trims and components are listed
Zippers, buttons, drawcords, and labels are specified
Print, embroidery, patch, or artwork files are attached
Artwork size and placement are mentioned
Colour references are provided
Packaging and finishing requirements are included
Sample size is confirmed
Expected order quantity is mentioned
Any special compliance or testing need is stated
Revision history is updated
Approval process for samples is clear
A complete enquiry helps the manufacturer respond faster and more accurately. It also helps avoid repeated clarification messages before sampling can even begin.
If the design is still at the idea stage, ZOOKS can review the available sketch, image, or concept and guide the next steps needed to convert it into a usable production specification.
Ready to develop samples or plan bulk production? Send your clothing design, reference images, quantity, fabric preference, and size requirements to ZOOKS for a custom apparel manufacturing enquiry.
A production-ready specification does not remove creativity from clothing design. It protects it. The clearer the instructions, the easier it becomes for the manufacturer to turn the design into a sample, improve it through approvals, and produce it consistently in bulk.